Highlights
Parking Location Tracker
In this session, we built a Parking Location Tracker app using Thunkable. Click on any of the following tabs to learn more about the different pages of our application.
Main Screen
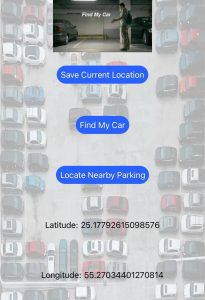
On our app’s home screen, users are presented with three buttons:
Save Current Location – saves the user’s current location and prints its latitude and longitude on the bottom of the screen.
Find My Car – begins Google Maps directions to the user’s saved parking location.
Locate Nearby Parking – opens Google Maps highlighting nearby parking locations to the user.
Find My Car
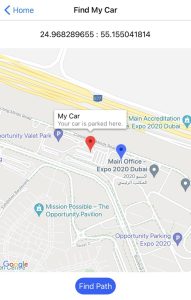
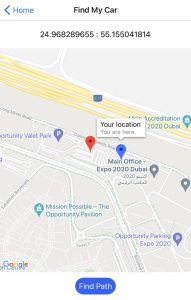
Once the user has saved their location, they proceed to the Find My Car page, which opens a Google Maps page with two pins, one of their saved location (shown in red), and one of their current location (shown in blue.)
Once the user clicks on Find Path, they can begin turn-by-turn direction using Google Maps.
Find Nearby Parking
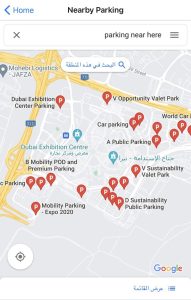
On our last page/feature of our app, users can find nearby parking places near their current location.